We used to recommend using our hard-coded text file to translate the hard-coded text in your websites. Examples of hard-coded text include:
- Read more links
- Buttons – like ‘Add to basket’ or ‘Submit’
- Form field error messages
In most cases, the hard-coded text file worked well, but sometimes it failed due to how some themes process forms. The following approach will work across the board
Overview of approach
The Multilingualizer adds a CSS class to the ‘body’ tag in your web-pages HTML. If you have 2 languages, the 2 classes will be:
- mllanguage0
- mllanguage1
What this allows us to do is to target CSS specifically for certain languages. CSS includes a ‘content’ property that you can set which allows you to override the text of that field.
Example of translating Read More links
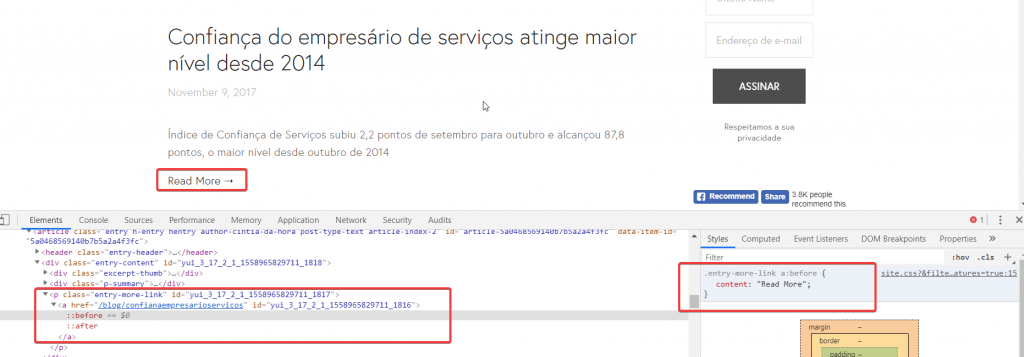
In the example image below, you can see that the Read More text is actually already set using CSS in this particular template.

You can see on the right hand side the CSS we are viewing which generates the text: Read More. In this example, the site has 2 languages configured: Portuguese and English, so language0 = Portuguese and language1 = English.
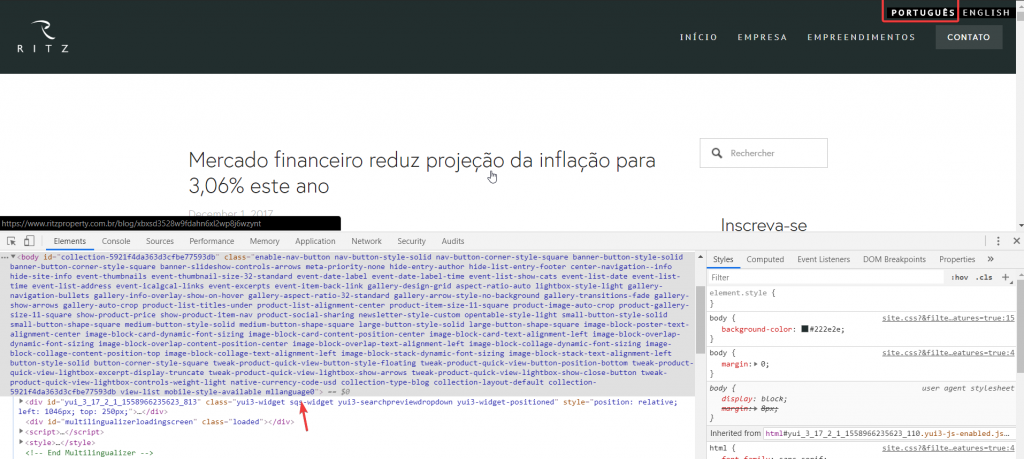
We do not need to alter the CSS for English, just for the non-English languages, in this case language 0 which will have the class of mllanguage0 as in this image:

So – the CSS to alter the Read More text in this example for Portuguese would be like this:
.mllanguage0 .entry-more-link a:before {
 content: "Consulte mais informação";
 }
To add custom CSS to your website is different per-platform but it’s normally located under the ‘Design’ or ‘Styles’ section or possibly under ‘Custom CSS’. Once you’ve found the CSS editor area, paste the text above and now in this example the Portuguese version will always show the translated text for this hard-coded piece of text.

More complicated examples
One thing about the CSS content property is that it only works on the :before and :after CSS pseudo-selectors.
Therefore, if you are changing text that doesn’t use :before or :after already there’s a little more work involved. Basically, you have to hide the existing content and add the new content using :before like in this example to translate newsletter ‘Submit’ button text:
.mllanguage0 .newsletter-form-button-label {
visibility:hidden;
}
.mllanguage0 .newsletter-form-button-label:before {
visibility:visible;
content:"Enviar";
}
